


Hey there! I'm a supplier of wood urns, and I've seen my fair share of damaged ones over the years. Whether it's a small scratch, a big crack, or some other kind of damage, I'm here to share with you how you can repair a damaged wood urn. It's not as hard as you might think, and with a little bit of know - how, you can bring that urn back to its former glory.
Assessing the Damage
First things first, you've got to take a good look at the urn and figure out what kind of damage it has. Is it just a surface scratch? Maybe it's a deeper cut or a crack. Surface scratches are usually the easiest to deal with. They're just on the top layer of the wood and don't really affect the structure. Cracks, on the other hand, can be a bit more tricky, especially if they're long or deep.
For surface scratches, you can often fix them with some simple sanding and refinishing. But if there's a crack, you'll need to think about how to fill it and make sure it doesn't get worse. And if there are any missing pieces, you'll have to find a way to replace them.
Gathering the Tools and Materials
Once you know what you're up against, it's time to gather the tools and materials you'll need. For basic repairs, you'll probably need sandpaper in different grits (coarse for the initial sanding and fine for the finishing touches), wood glue, a putty knife, and some wood stain or finish that matches the color of your urn.
If you're dealing with a crack, you might also want to get some wood filler. There are different types of wood filler out there, so make sure you choose one that's suitable for the kind of wood your urn is made of. And if you need to replace a missing piece, you'll have to find a piece of matching wood.
Fixing Surface Scratches
Let's start with those surface scratches. The first step is to sand the scratched area gently. Start with a coarse - grit sandpaper to remove any rough edges or splinters. Then, switch to a finer grit to smooth out the surface. Make sure you sand in the direction of the wood grain. This will give you a better finish and prevent the sandpaper from leaving any visible marks.
After sanding, clean the area with a damp cloth to get rid of any dust. Once it's dry, you can apply the wood stain or finish. Use a small brush and make sure you apply it evenly. Let it dry completely, and then you can give it a light sanding with a very fine - grit sandpaper to make it extra smooth.
Repairing Cracks
Cracks are a bit more complicated. First, you need to clean the crack thoroughly. Use a toothpick or a small brush to remove any dirt or debris. Then, apply some wood glue into the crack. Make sure you fill it completely, but don't use too much glue as it can make a mess.
You can use a putty knife to spread the glue evenly and press the edges of the crack together. If the crack is really big, you might want to use some clamps to hold it in place while the glue dries. Let the glue dry according to the manufacturer's instructions.
Once the glue is dry, use a putty knife to scrape off any excess glue. Then, sand the area smooth. You might need to use a wood filler to make the surface even. Apply the filler with a putty knife, let it dry, and then sand it down. Finally, apply the wood stain or finish to match the rest of the urn.
Replacing Missing Pieces
If there's a missing piece, finding a matching piece of wood is crucial. You can try to find a piece from a scrap of the same type of wood. If that's not possible, you might have to go to a woodworking store and see if they can help you.
Once you have the piece, you need to cut it to the right size and shape. You can use a saw for this. Then, sand the edges to make them smooth. Apply wood glue to the area where the piece will be attached and press the new piece into place. Use clamps to hold it firmly while the glue dries.
After the glue is dry, sand the area to blend it in with the rest of the urn. Then, apply the stain or finish.
Finishing Touches
After all the repairs are done, it's time for the finishing touches. Take a close look at the urn and make sure everything looks good. You can give it a final light sanding to make it super smooth. Then, apply another coat of wood stain or finish for extra protection and a better look.
Let the finish dry completely, and your damaged wood urn should be as good as new!
Our Wood Urns
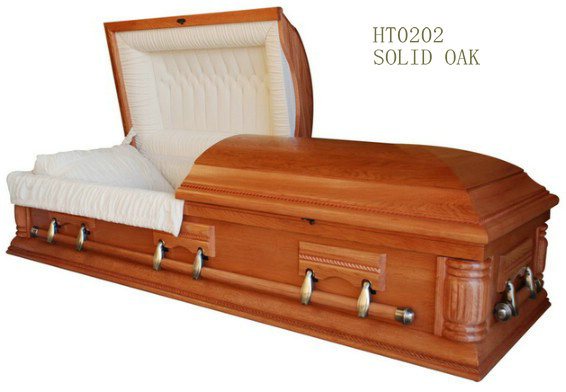
At our place, we offer a wide range of high - quality wood urns, like the Wood Casket HT - 0302, Wood Casket HT - 0309, and Wood Casket HT - 0202. These urns are made from top - notch wood and are built to last. But even the best - made urns can get damaged sometimes, and that's why it's important to know how to repair them.
Contact Us for Purchasing
If you're in the market for a new wood urn or have any questions about our products, don't hesitate to reach out. We're always here to help you find the perfect urn for your needs. Whether you're looking for a simple design or something more elaborate, we've got you covered.

References
- Woodworking for Beginners: A Guide to Basic Repairs.
- The Complete Book of Wood Finishes.


